
Billhooks Movement Trays
Richard Lloyd, also known as Captain Blood, returns with more medieval mayhem in the form of a guide to creating action-packed movement trays for Never Mind the Billhooks.
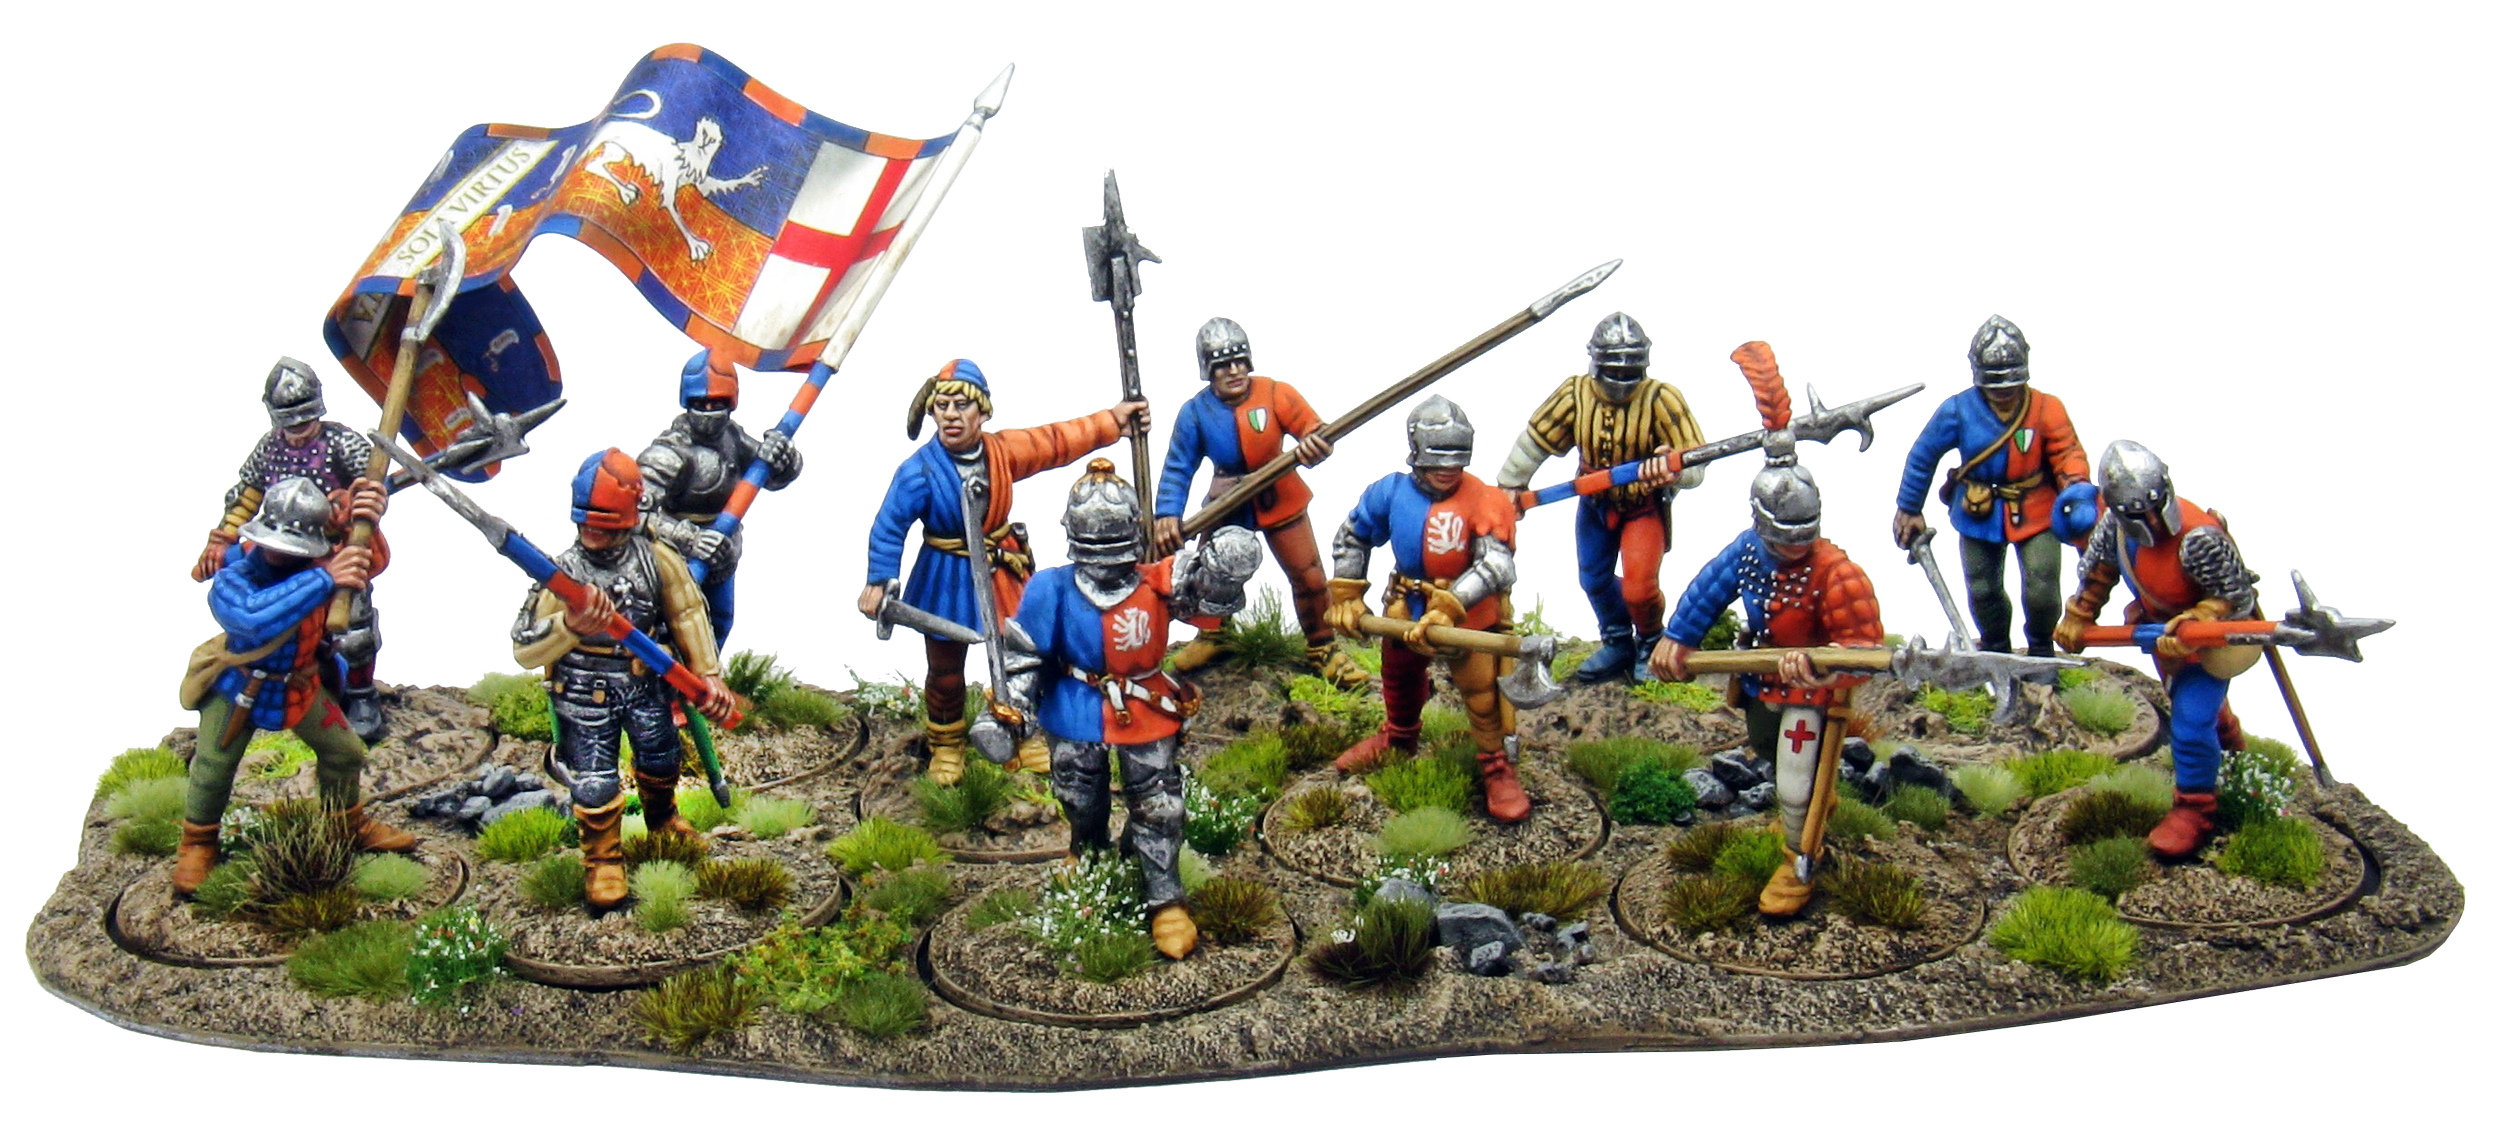
Figures in Never Mind The Billhooks are organised into companies of six, eight, or twelve, and casualties are removed one figure at a time. This means your typical 100-point Billhooks army may consist of as many as 70 - 80 individually based figures, so movement trays are a fairly essential aid to speeding up play, especially in the opening manoeuvre phase, when all companies are at full strength and play is racing along.
The wargames hobby is awash with off-the-shelf movement trays in various materials, with MDF rectangles being the product most people seem to reach for. For me, though, that MDF step is just too visually intrusive. I’m not too keen on rectangular trays either, with their perfectly ranked-up slots. Yes, they use space efficiently, but I want my units to resemble natural-looking clusters of medieval fighting men in organised mobs - not parade ground drill formations.
Most of all, I want movement trays that appear to merge into my terrain, rather than sticking out like sore thumbs.
Scratch-building presents a challenge, though. How to countersink recesses for the figures’ bases?
The cunning answer is not to try making holes in your tray, but to build your tray around some holes.
First, you need some laser-cut acrylic rings* - each ring is just a millimetre or so deep, with an internal diameter of 26mm (to allow for any tiny irregularities in the 25mm washers on which all my figures are based). These rings are going to form the slots for bases in the finished tray.

Next, take a sheet of 0.75mm plasticard and cut a rough oblong about 150mm wide by 75mm deep. If you’re careful, you can get four trays from a 300mm x 150mm sheet. Snip away at the corners and indent the edge here and there to create a slightly irregular outline. Sandpaper the edges to clean off any burrs.
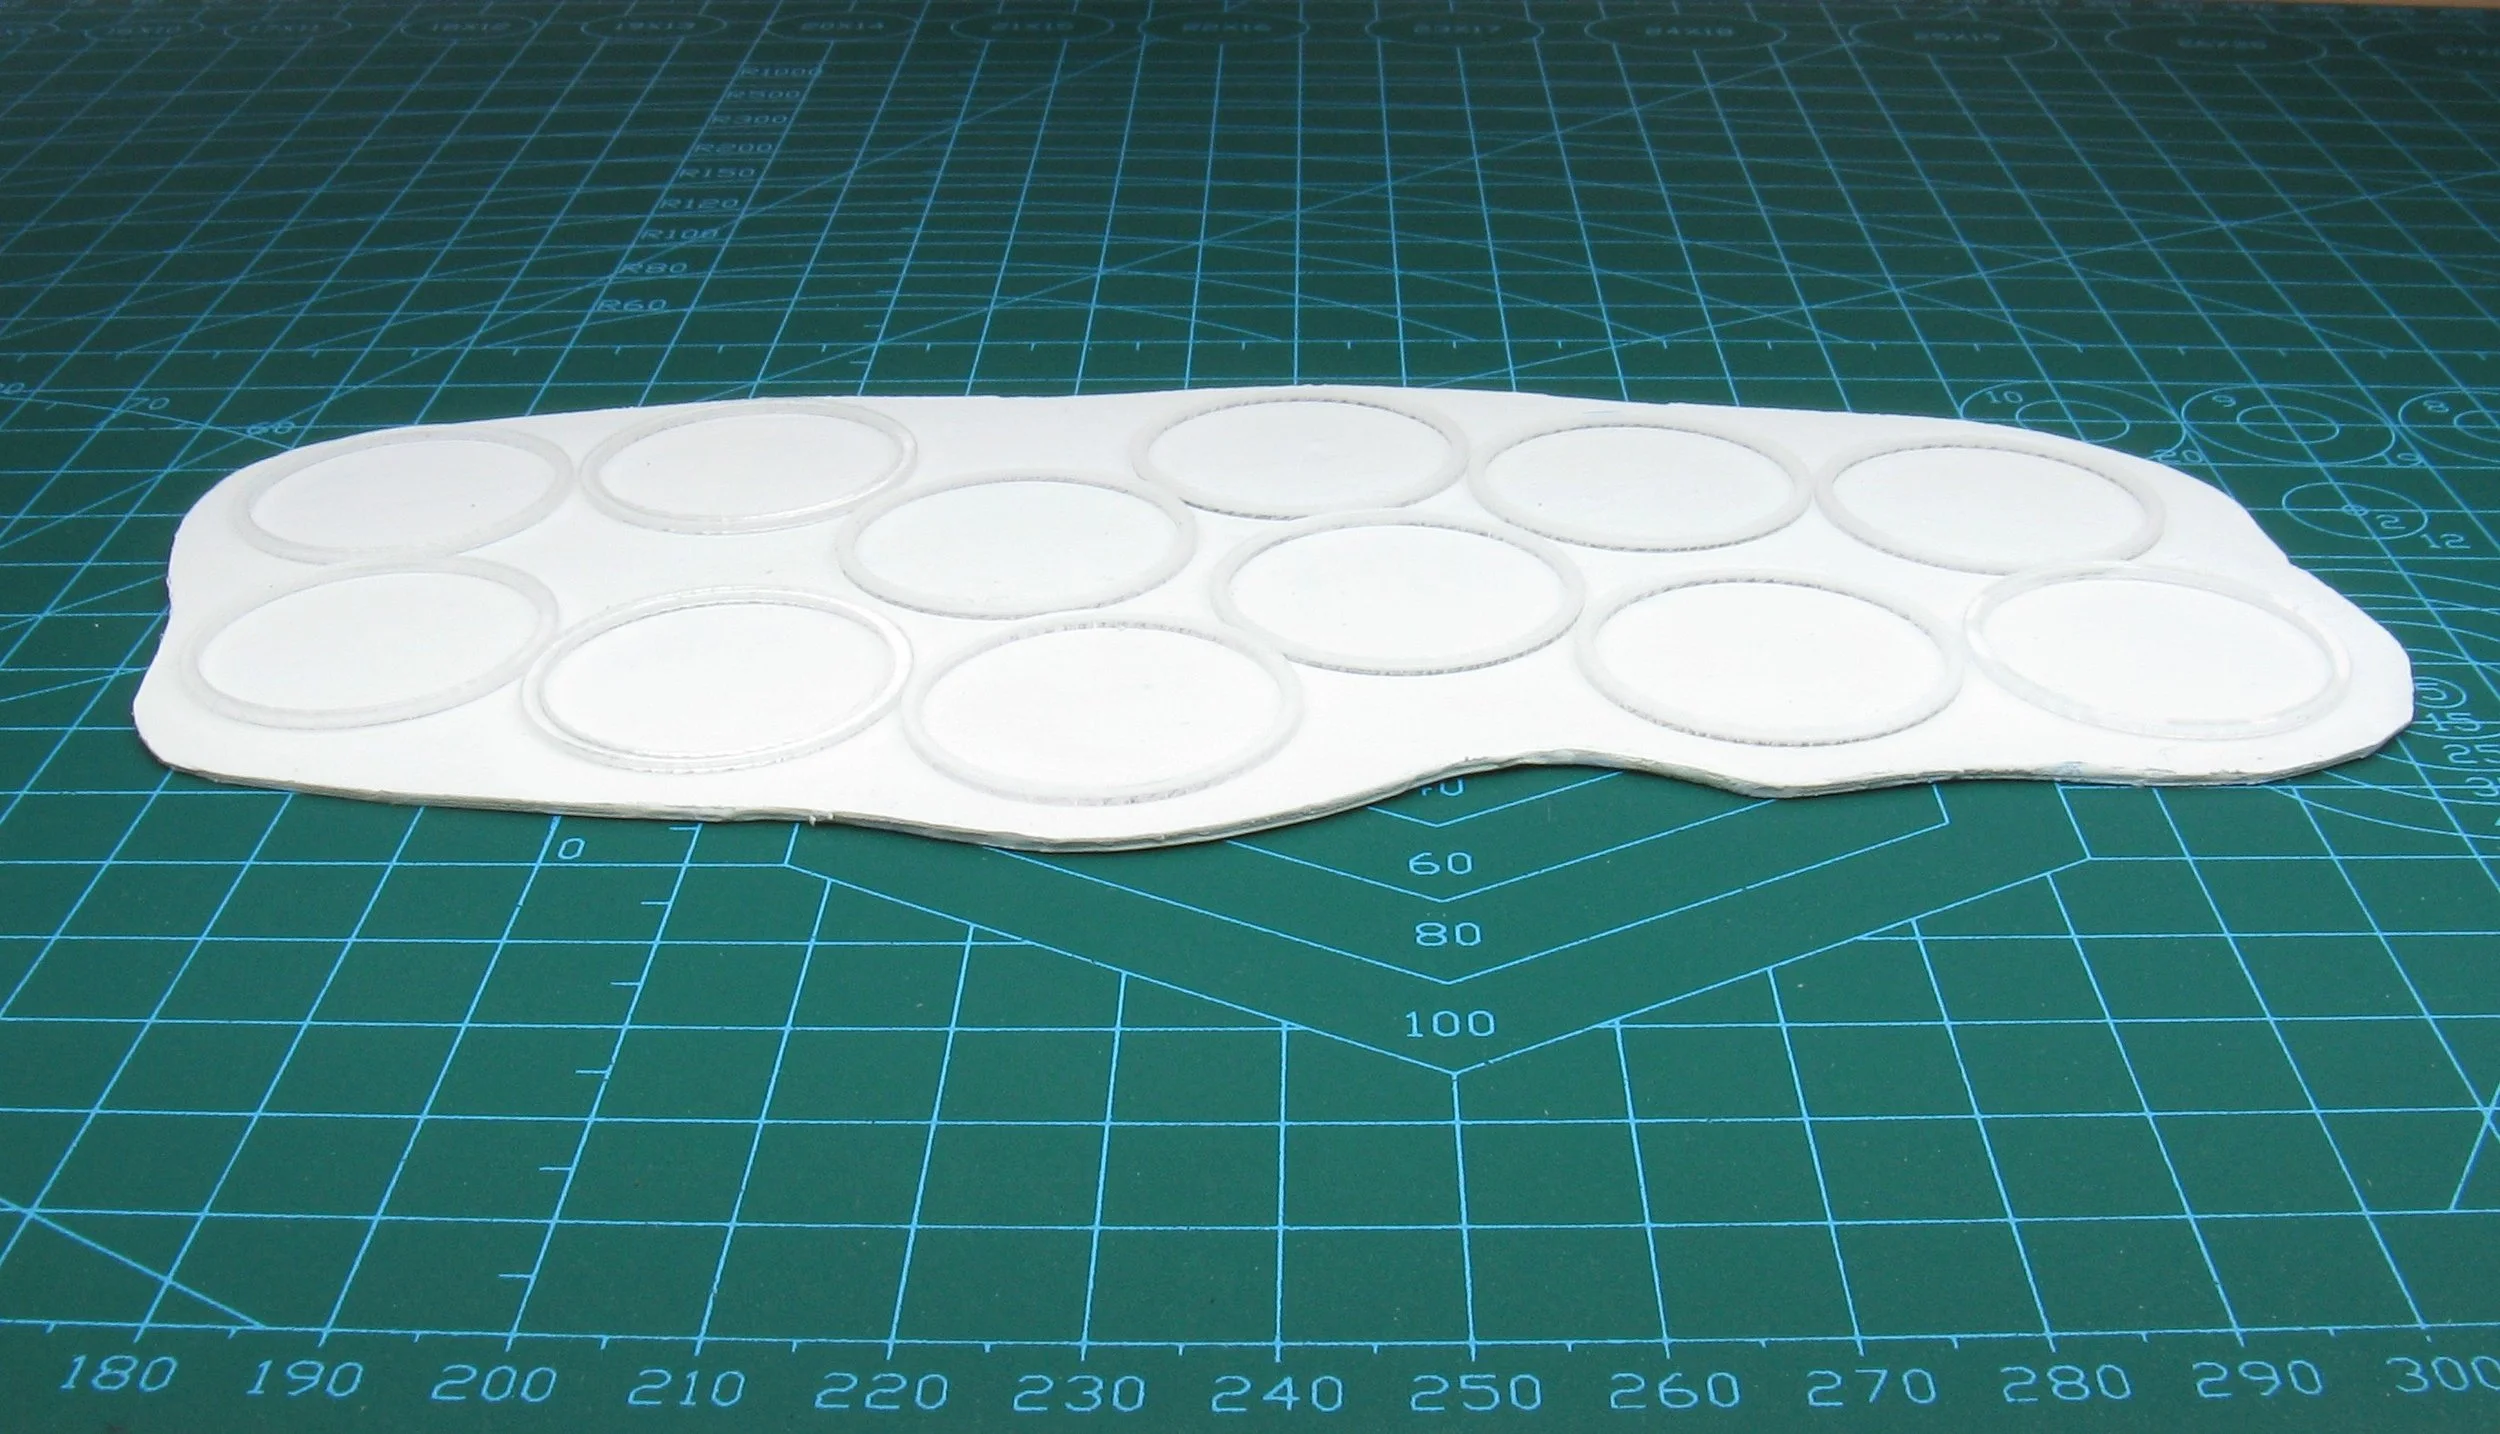
Now, superglue 12 of the acrylic rings onto the plasticard to form two slightly irregular ranks. The exact size of the tray and the openness/closeness and layout of the rings are obviously down to personal preference. With that done, fill between the rings with gloop, taking care to cover the exposed top rims of the rings, but not to get any of the texture inside the ring itself.

While the basing compound is still wet, push in a few clusters of aquarium or model railway gravel here and there to serve as rocks. Once the texturing has fully dried, it’s time to paint. Primer and drybrush the tray in the same colours as your bases.

I build up successive highlight layers of earth coloured paint, then apply a contrasting colour to larger rocks and black out the interior of the rings so the tray looks neat once casualties start to be removed.

All that’s left is to add a few grass tufts or sprigs of foliage and that’s it. Job done.

I’ve made several dozen of these trays over the last few years. Each takes an hour at most to make, plus painting time and a tray works out at a couple of pounds in material cost. The profile is extremely low (which is the whole point), but I haven’t found them difficult to pick up and move.
*The acrylic rings are from Oshiro Model Terrain and are available for 20mm, 25mm, and 40mm diameter round bases.

By Richard Lloyd